
Get your salt system running in just a few steps.
Step 1: Measure and Cut PVC Pipe
Cut the PVC pipe to a length of 273mm to fit the chlorinator.
Ensure the cut is straight and clean to avoid leakage.
We provide both 1.5″ and 2″ adapters—please match to your pipe size.
Step 2: Insert Threaded Rings (Nuts)
Slide the threaded nuts onto both ends of the pipe.
These will be used later to lock the unit.
Step 3: Apply Glue and Insert Adapters
Apply PVC adhesive to the pipe ends and insert the adapters.
Let the glue cure before proceeding.
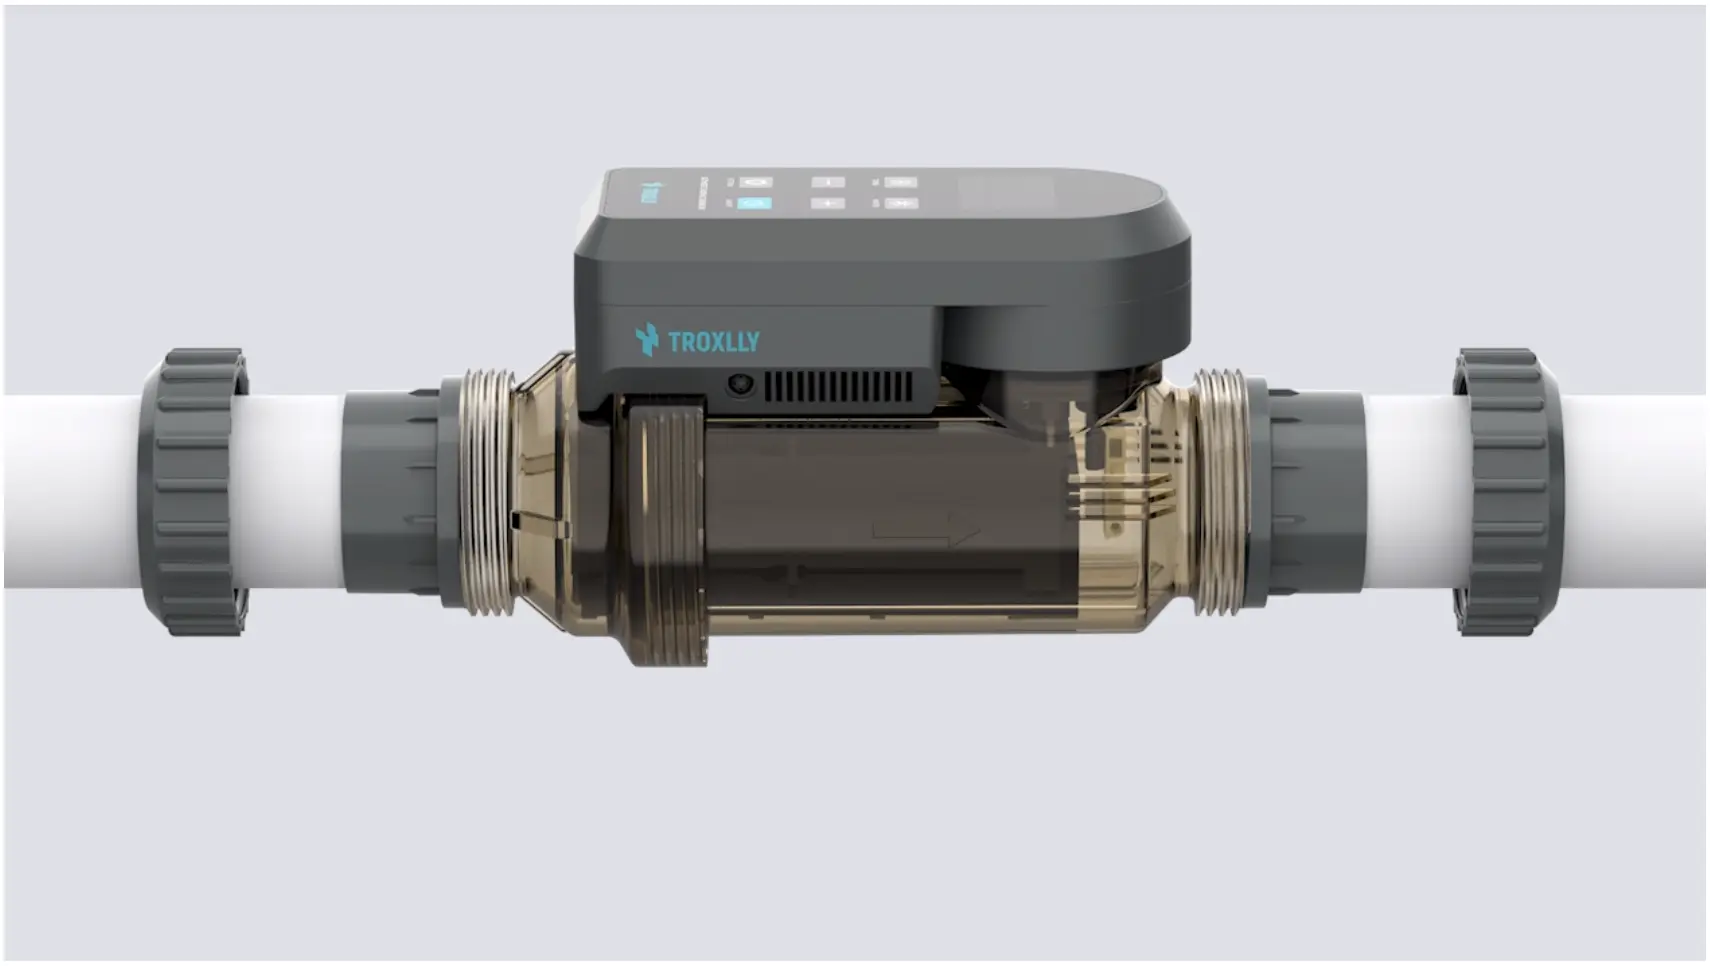
Step 4: Connect the Chlorinator Body
Align both ends of the chlorinator with the adapters.
Ensure O-rings are inside to prevent leakage.
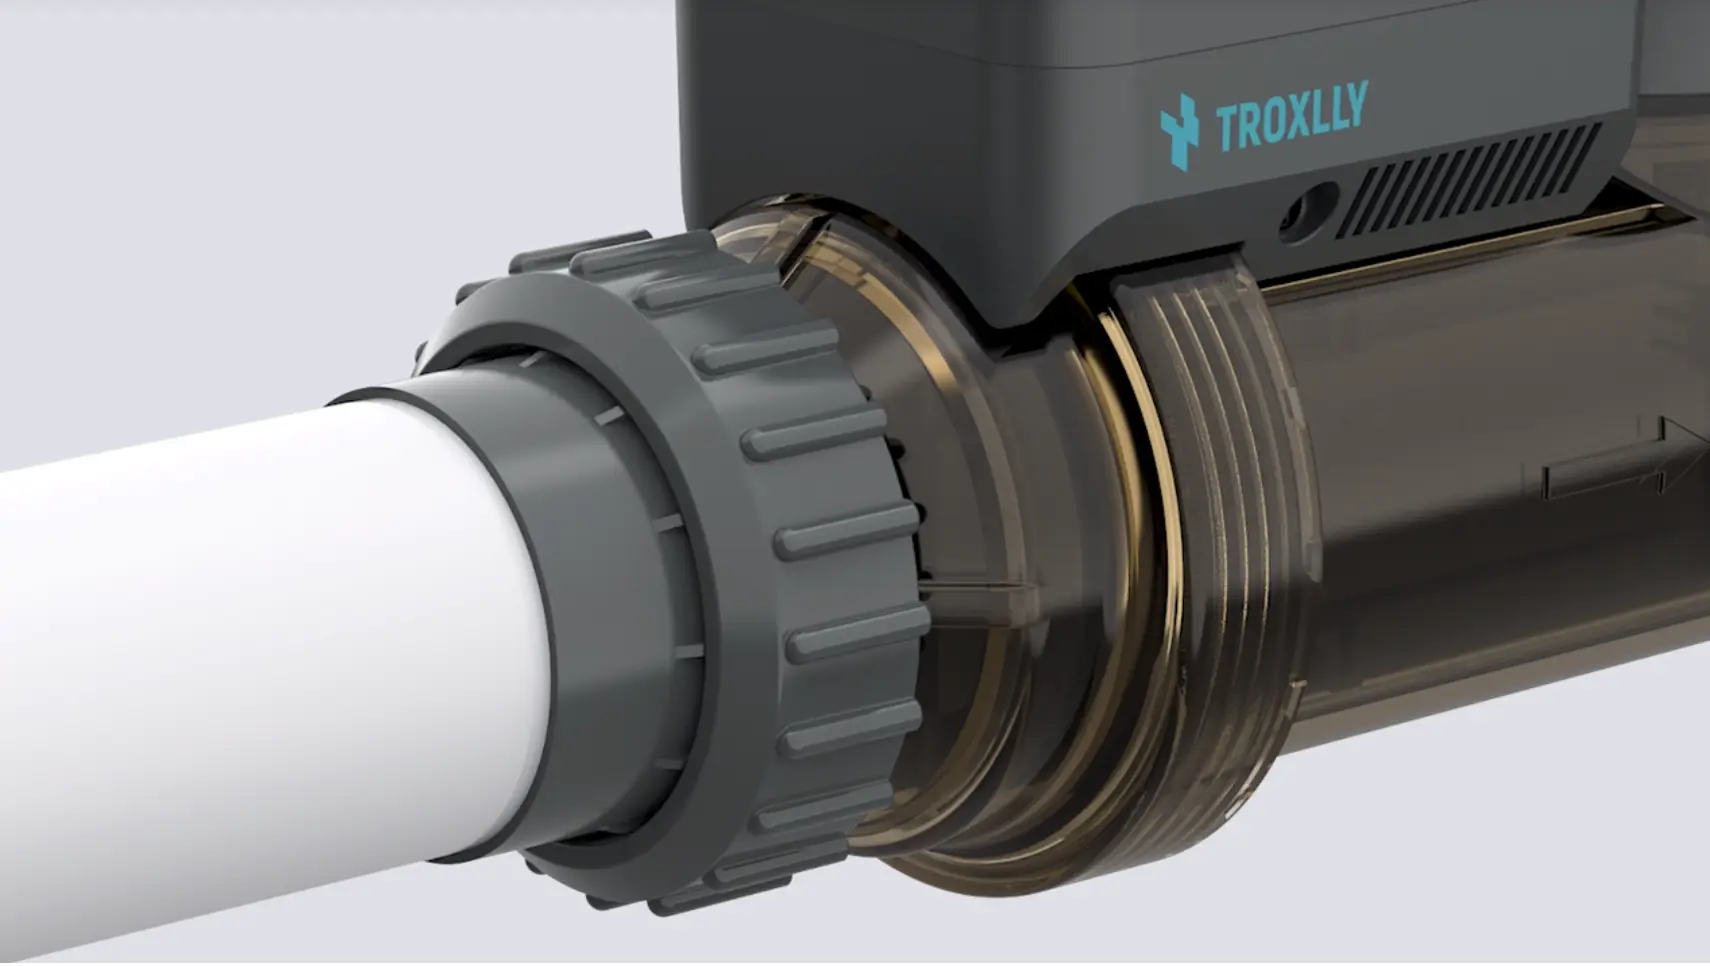
Step 5: Tighten the Nuts
Tighten the nuts on both sides. Hand-tight is usually sufficient.
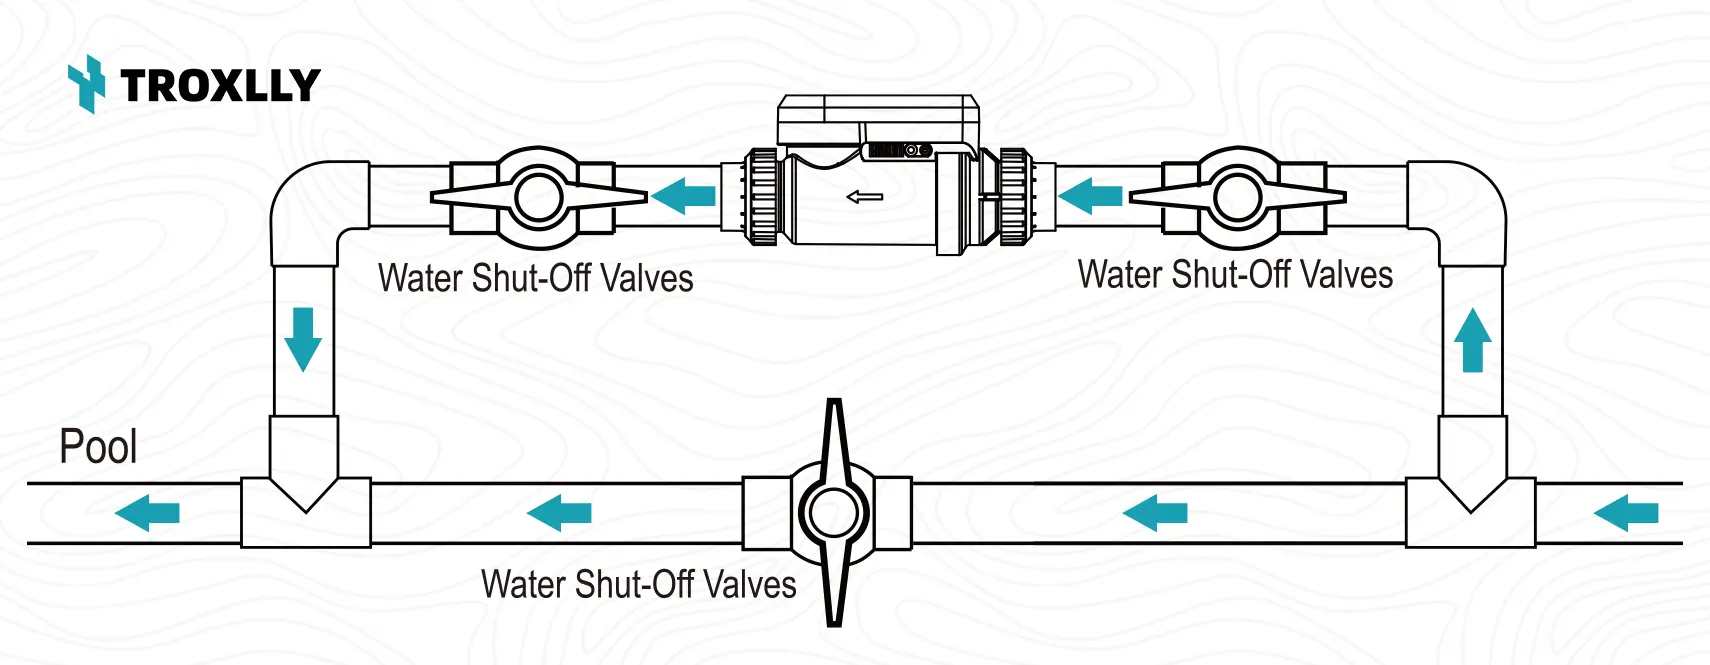
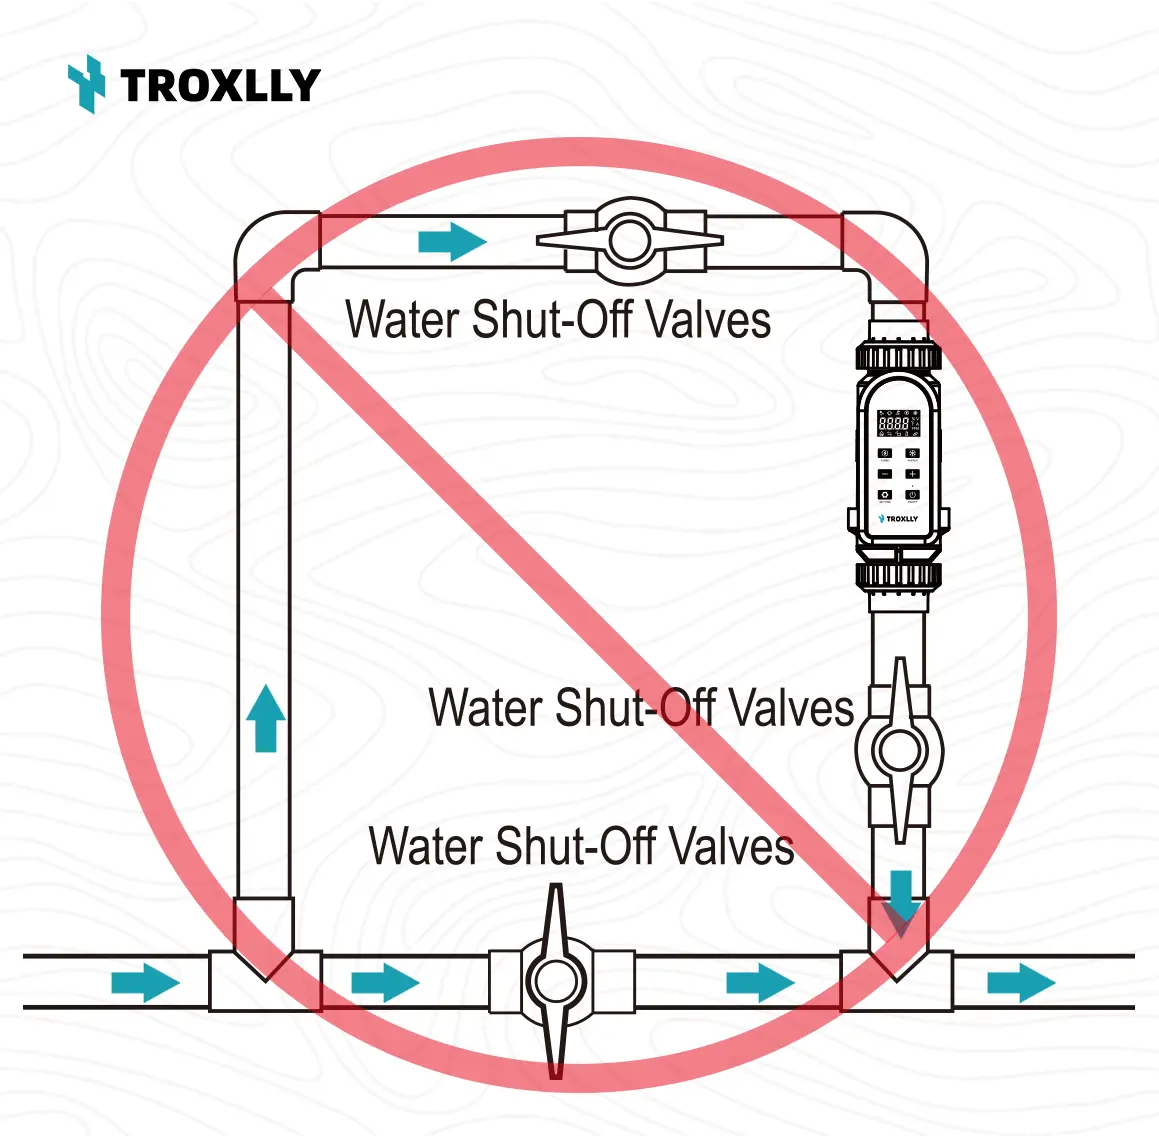
Horizontal Installation Recommended
Install shut-off valves on both ends for easy future maintenance.
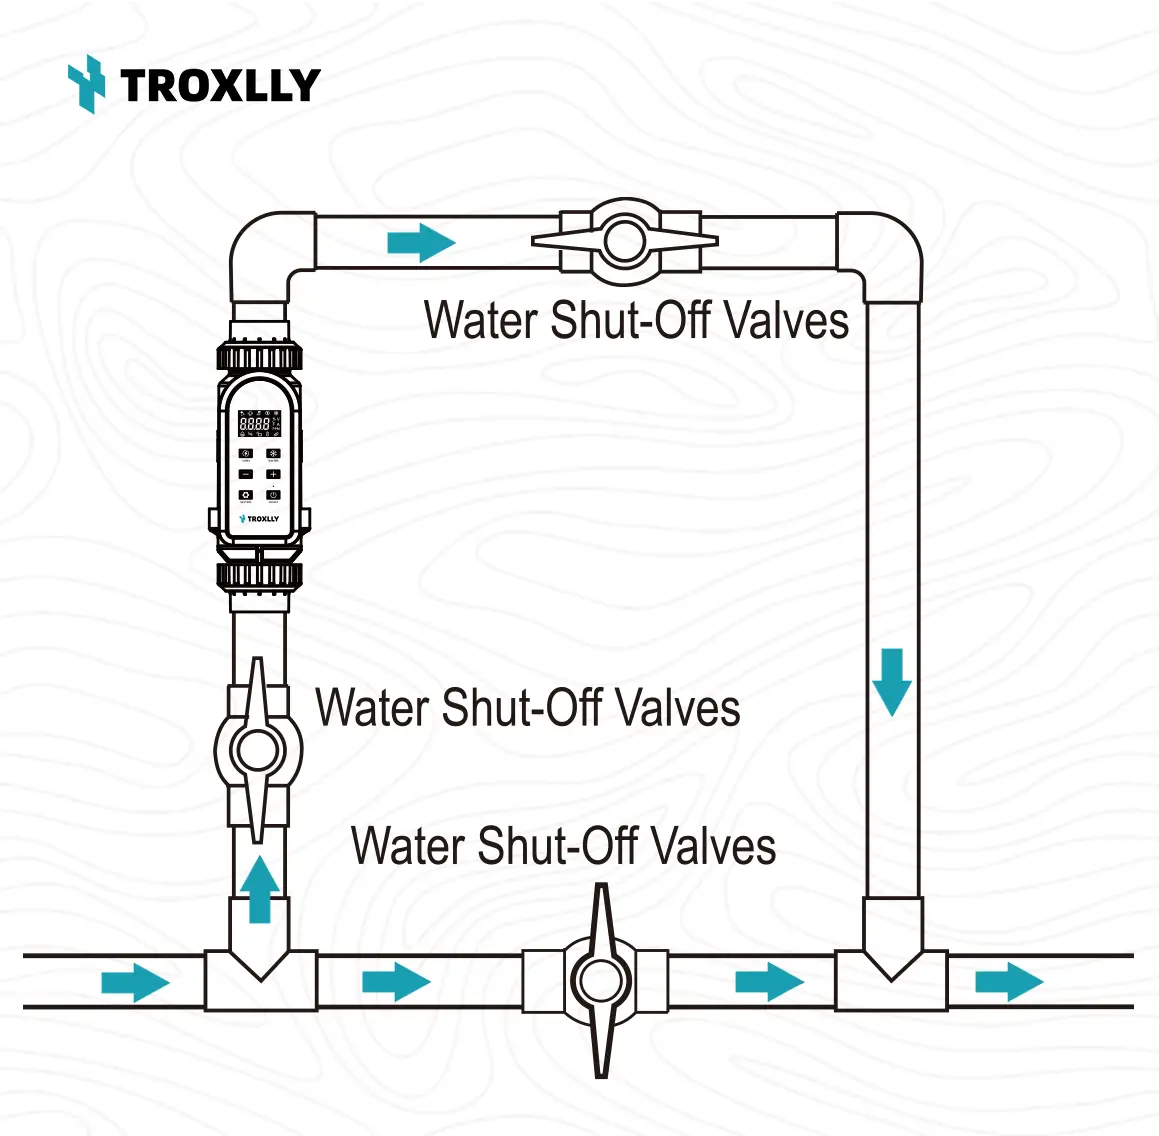
Vertical Mount (If Needed)
If vertical installation is necessary, make sure water flows upward.
Avoid: Downward Water Flow
Do not install with downward water flow—it can cause sensor malfunction.
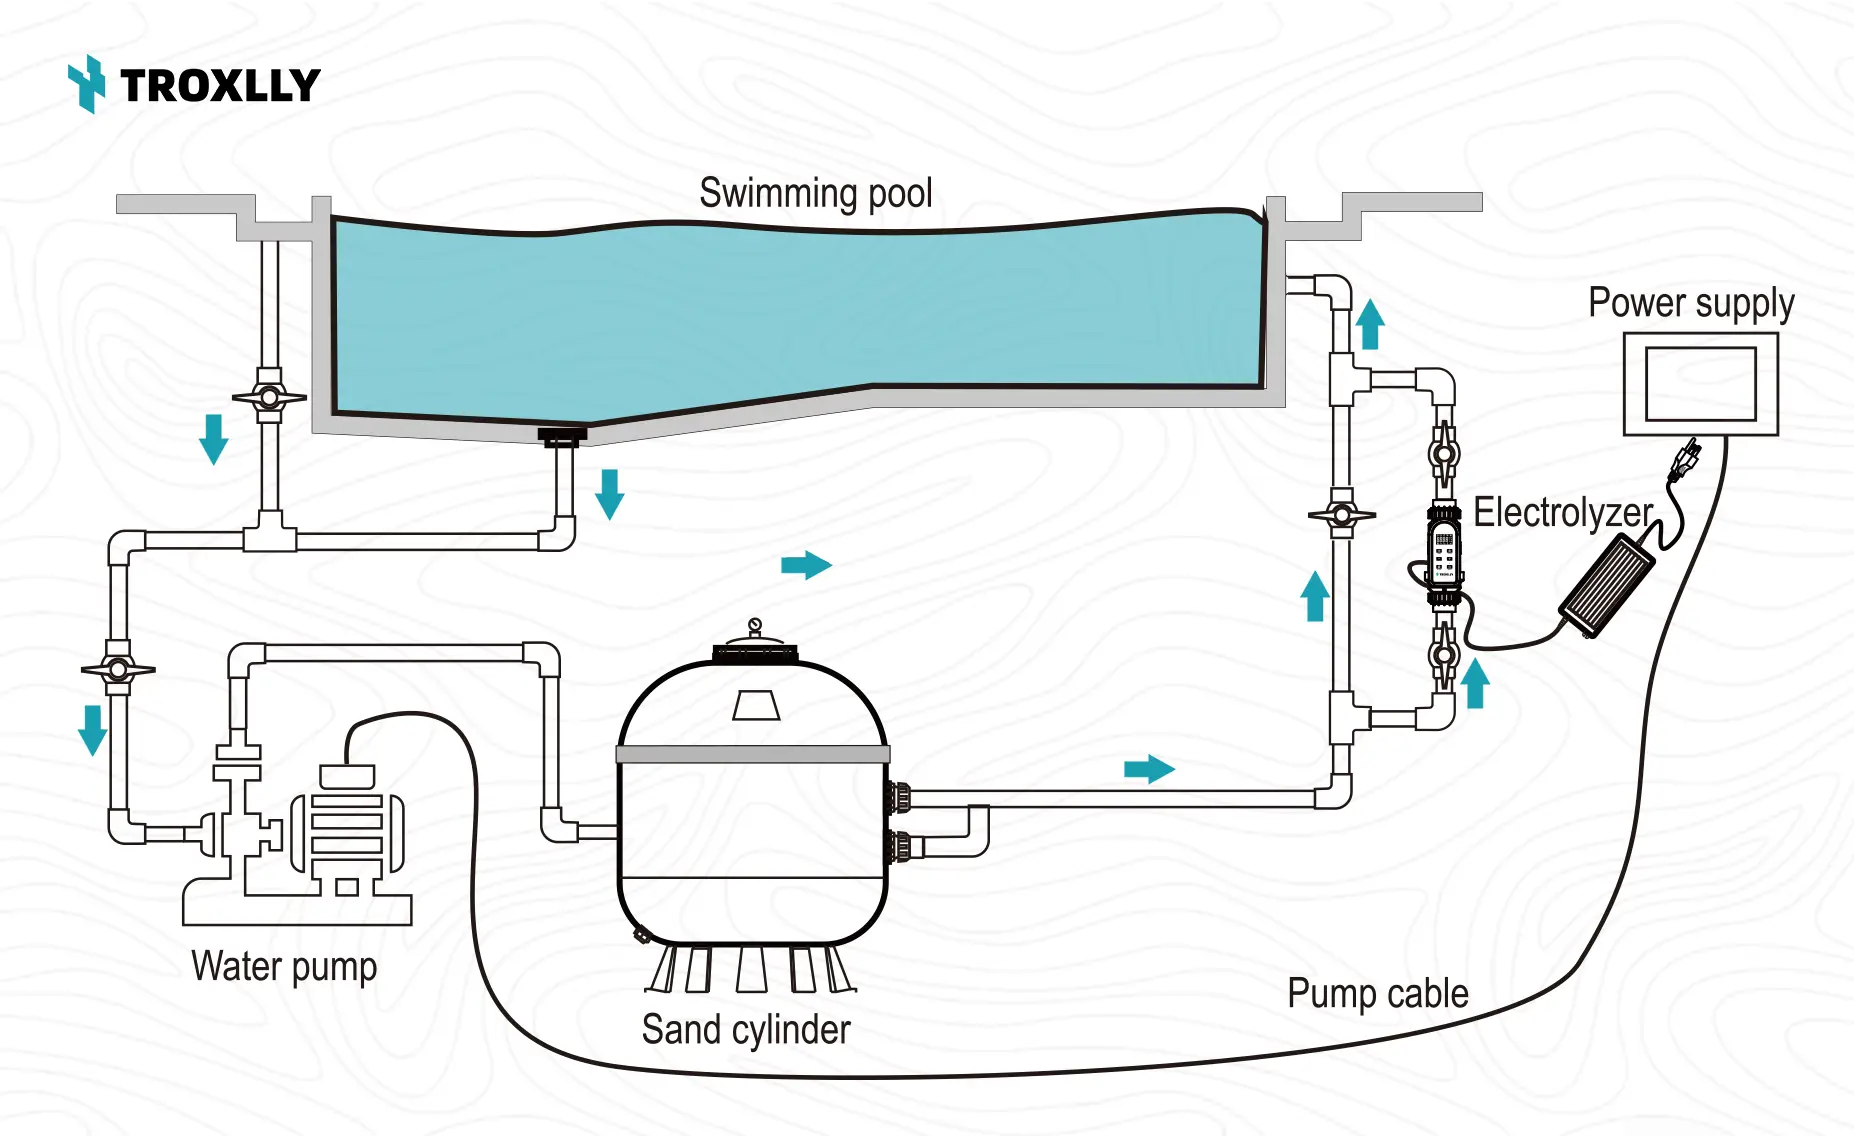
System Schematic Diagram
Refer to this diagram to integrate with your pump, sand filter, and pool piping.
Preparations Before Use
Outdoor Power Adapter Protection Tips
